M Capital
M Capital Precious Metals Funds

M Capital Precious Metals Funds – Explore new opportunities for your gold holdings beyond traditional jewelry and investments

We have two app

1)Laravel web app

2)Wordpress website (General Pages)

App Repo Details

https://aananth123@bitbucket.org/aananth123/app.git

please get read and write permission from Mr.Arul Ananth (chris.vera@gmail.com)

Website Repo Details

https://aananth123@bitbucket.org/aananth123/website.git

please get read and write permission from Mr.Arul Ananth (chris.vera@gmail.com)

Server Requirements
All server requirements are stated bellow
  • PHP Version 8.3
  • MySQL Version 8.0+ or MariaDB version 10.6+
  • BCMath PHP Extension
  • Ctype PHP Extension
  • cURL PHP Extension
  • DOM PHP Extension
  • Fileinfo PHP Extension
  • GD PHP Extension
  • JSON PHP Extension
  • Mbstring PHP Extension
  • OpenSSL PHP Extension
  • PCRE PHP Extension
  • PDO PHP Extension
  • pdo_mysql PHP Extension
  • Tokenizer PHP Extension
  • XML PHP Extension
  • Filter PHP Extension
  • Hash PHP Extension
  • Session PHP Extension
  • Zip PHP Extension
  • allow_url_fopen()
  • file_get_contents()
image
Website Installation
Main website Installation (https://mcapitalopportunities.com/)
    • Create a Lightsail instance:
      • Go to the Lightsail console and choose "Create an instance".
      • Select an instance plan that meets your website's requirements (e.g., a Bitnami WordPress instance).
      • Choose a region and availability zone.
      • Configure any additional settings as needed (e.g., static IP address, SSH key pair).
      • Click "Create instance".
    • Access the WordPress admin:
      • Once the instance is created, you can access the WordPress admin dashboard by going to the instance details page and clicking the "Open browser" link.
      • Enter the default username and password (usually "admin" and "admin") to log in.
    • Install and configure WordPress:
      • If you're using a Bitnami WordPress instance, WordPress will already be installed and configured.
      • If you're using a regular instance, you'll need to install WordPress manually and configure it.
    • Customize your website:
      • Once you're logged into the WordPress admin, you can start customizing your website by adding content, themes, and plugins.
    • Set up a domain name (optional):
      • If you want to use a custom domain name for your website, you can register a domain name and set up DNS records to point it to your Lightsail instance.
  • Reference Link https://docs.aws.amazon.com/lightsail/latest/userguide/amazon-lightsail-tutorial-launching-and-configuring-wordpress.html
    • Connect Bibucket
      • Before continue the app folder installtion make sure you installed the wp folder to lightsail root directory /opt/bitnami/wordpress directory upload and install wordpress basic steps. Please verify https://www.yourdomain.com is connecting on the browser.
      • Open the lightsail Instance
      • Choose the directory "cd /opt/bitnami/wordpress"
      • git init
      • git commit -m "Initial commit"
      • git remote add origin https://aananth123@bitbucket.org/aananth123/website.git
      • git pull origin main
      • This will ask bitbucket username and password
    • Install wordpress by bitbucket
      • Open the terminal select the directory
      • "cd /opt/bitnami"
      • "git clone https://aananth123@bitbucket.org/aananth123/website.git"
      • "cd wordpress"
      • git pull origin main
      • This will ask bitbucket username and password
      • Visit https://yourdomain.com
      • This will redirect to install page
    • New Update Deployment
      • Open the terminal select the directory
      • "cd /opt/bitnami/wordpress"
      • git pull origin main
      • This will ask bitbucket username and password
Installation
Application Installation Process

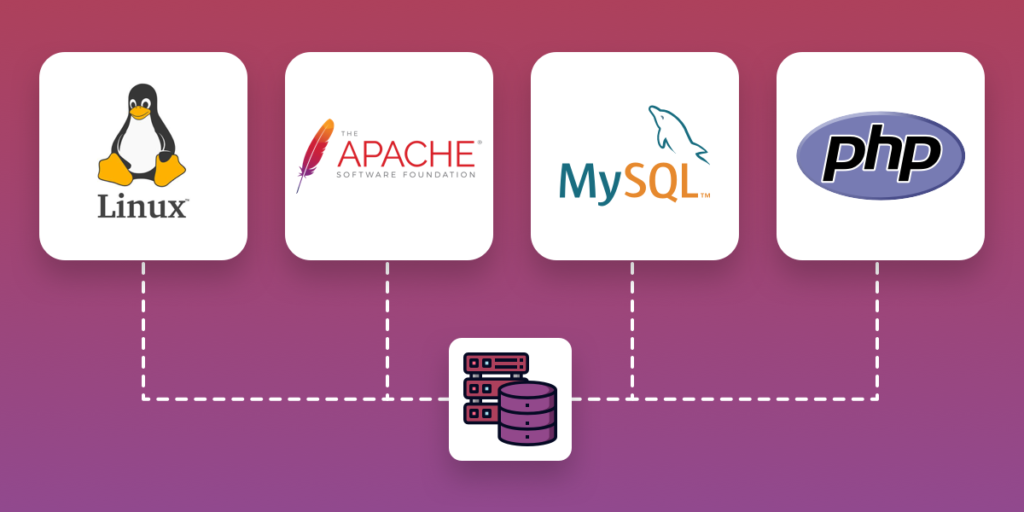
Installation is very easy with our Easy Installer. You can install yourself simply in few steps without any coding knowledge. We develop our installation system to make the installation process flawless and easy.

Installation Steps:

  • cd /opt/bitnami/
    git clone https://aananth123@bitbucket.org/aananth123/app.git select cd /opt/bitnami/app

  • Login and Permission Changes
    • Login to the Lightsail instance:
    • Login to the SSH terminal using the provided credentials.
    • Run the following commands to adjust permissions for the storage directory:
    • sudo chown -R bitnami:bitnami /opt/bitnami/app/storage
    • sudo chmod -R 755 /opt/bitnami/app/storage
  • Configuration Update
    • Edit the .env file:
    • Locate the `.env` file in your Laravel application's root directory (usually `/opt/bitnami/app/.env`) or rename .env.example file to .env
    • Update the following environment variables:
        • App Configuration:
          • APP_NAME: Set the desired application name (meta title and email from name).
          • APP_URL: Set this to your domain name or subdomain (e.g., `APP_URL=https://yourdomain.com`).
        • DB Configuration:
          • DB_CONNECTION: Set this to the database connection type (usually `mysql`).
          • You can collect all values from lightsail (wordpress) DB configuration
          • DB_HOST: Set this to the hostname or IP address of your database.
          • DB_PORT: Set your MySQL port number.
          • DB_USERNAME: Set your MySQL username.
          • DB_PASSWORD: Set your MySQL password.
          • DB_PREFIX: Set a prefix for your application's database tables to avoid conflicts with WordPress tables.
        • AWS Bucket Configuration More Info
          • AWS_ACCESS_KEY_ID: Set your AWS Access Key ID.
          • AWS_SECRET_ACCESS_KEY: Set your AWS Secret Access Key.
          • AWS_DEFAULT_REGION: Set the AWS region where your S3 bucket resides.
          • AWS_BUCKET: Set the name of your S3 bucket.
        • AWS MAIL Configuration More Info:
          • MAIL_MAILER: Set the mail sending method (e.g., `smtp` or a third-party service like SendGrid).
          • MAIL_HOST: Set your email server's hostname.
          • MAIL_PORT: Set your email server's port.
          • MAIL_USERNAME: Set your email username.
          • MAIL_PASSWORD: Set your email password.
          • MAIL_ENCRYPTION: Set this to "tls" for secure communication.
          • MAIL_FROM_ADDRESS: Set this to your email username.
          • MAIL_FROM_NAME: Set this to your desired sender name (e.g., "${APP_NAME}" or a static value).
  • Database Migrations and Packages Install
    • Access the SSH terminal through the Lightsail console interface.
    • Navigate to your Laravel application directory. (e.g., `cd /opt/bitnami/app`)
    • Execute the following commands in the terminal:
    • composer install
    • sudo chmod -R 777 /opt/bitnami/app/vendor
    • php artisan migrate && php artisan db:seed
    • php artisan key:generate

    • php artisan optimize:clear

Create Subdomain
Configuring a Subdomain for Your Laravel Application on AWS Lightsail

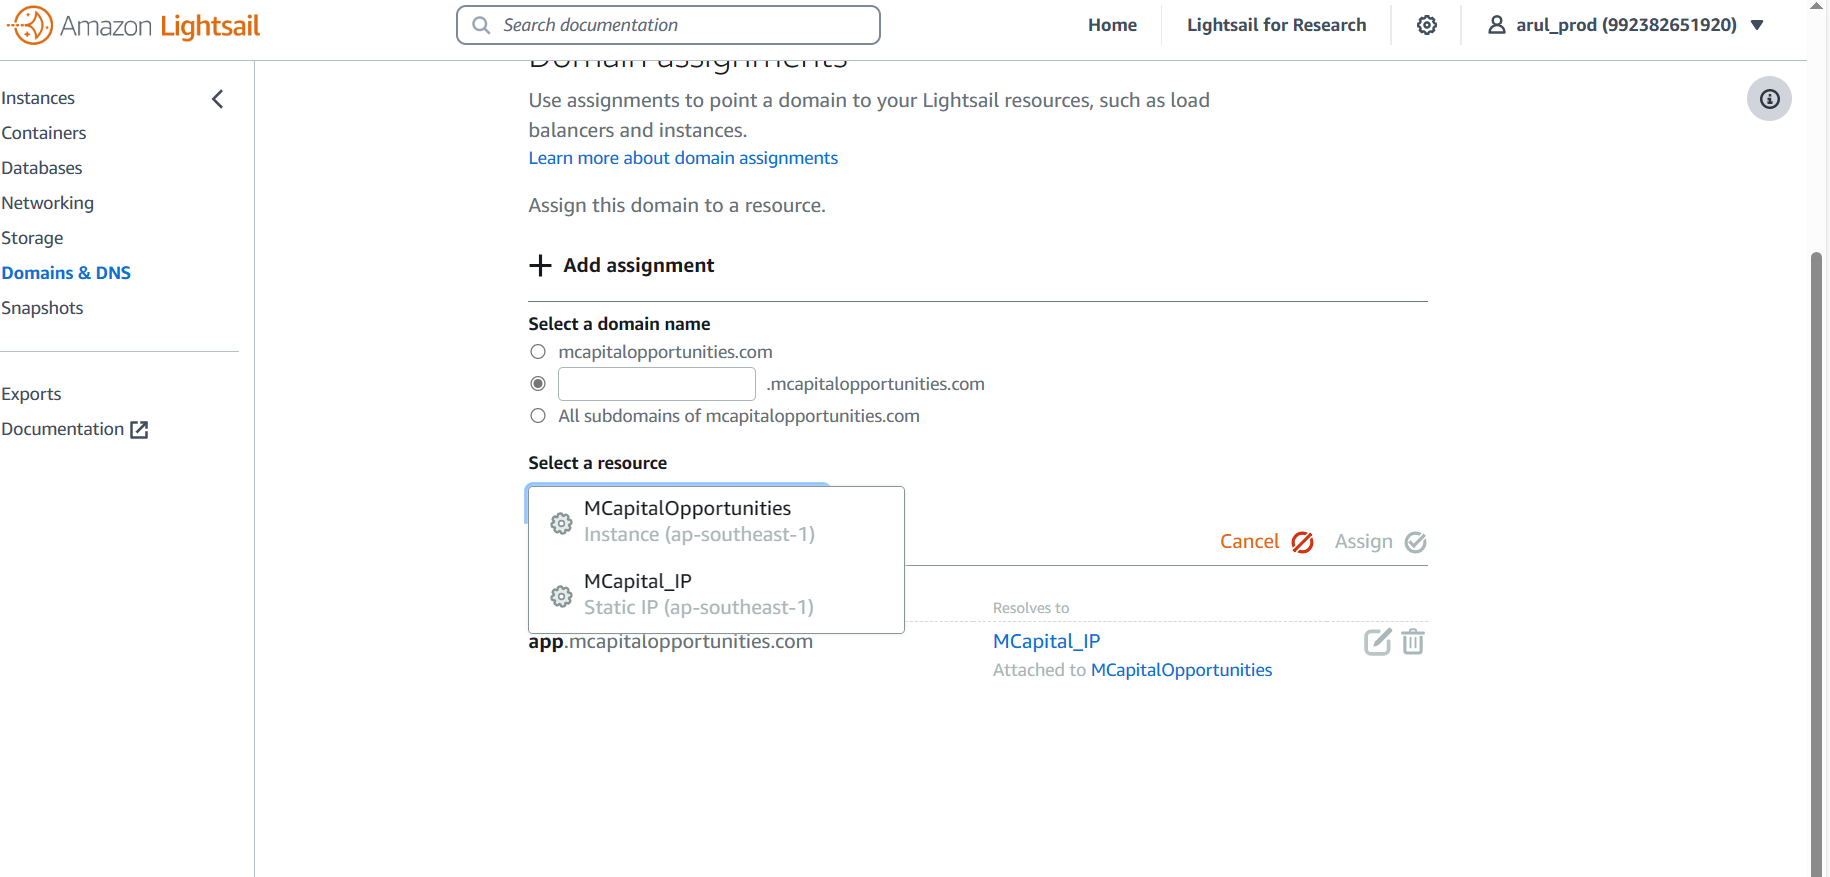
please follow the above image. Select the assigments and enter sub domain name and select the resource (AWS Lightsail instance IP)

Select the resource

  • Add the dns records subdomainname.maindomain.com. Resource name eg "app" value is lightsail instance public address
  • Go to the AWS Route 53 and select the Hosted zones and add new records for subdomain
  • Setup the subdomain root directory. Go to /opt/bitnami/apache/conf/vhosts create two conf file
  • Create file subdomainname.yourdomain.com-https-vhost.conf
  • Command "vim subdomainname.yourdomain.com-https-vhost.conf"
  • Create file subdomainname.yourdomain.com-vhost.conf
  • Command "vim subdomainname.yourdomain.com-vhost.conf"

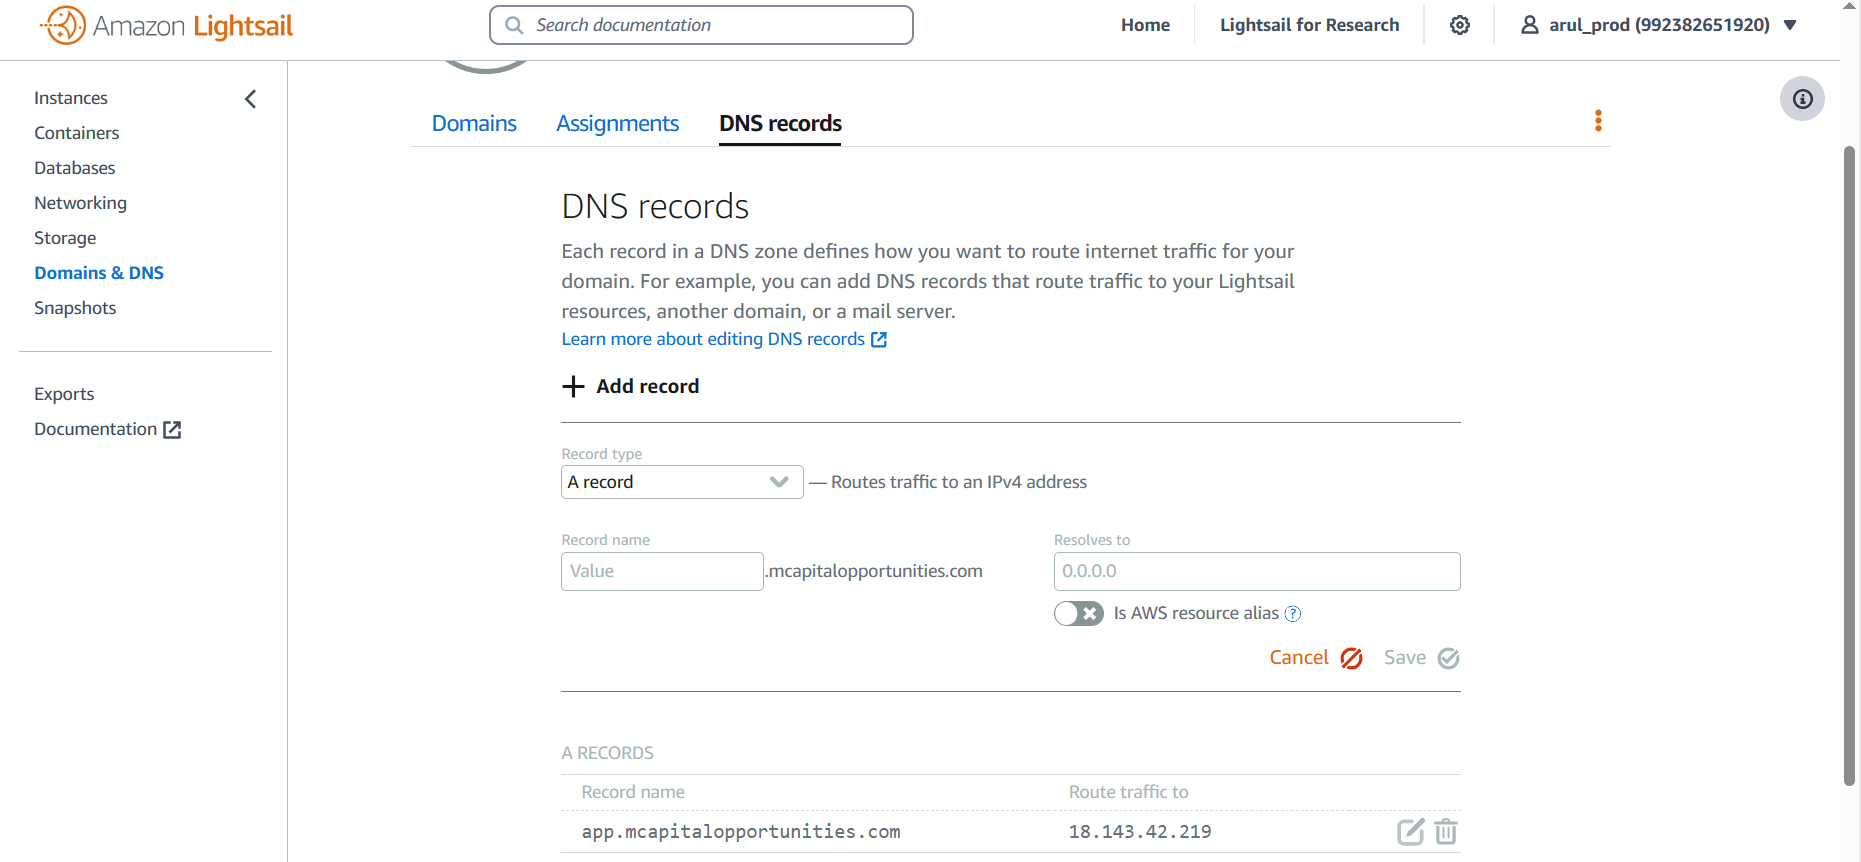
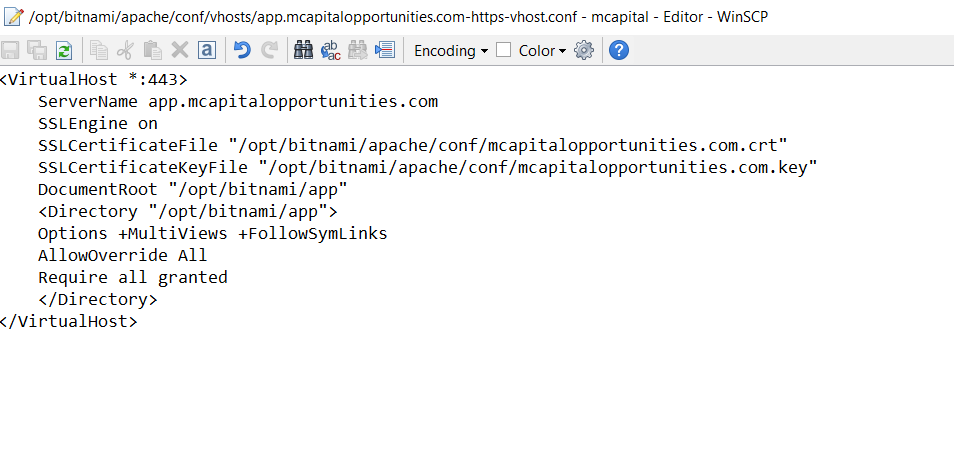
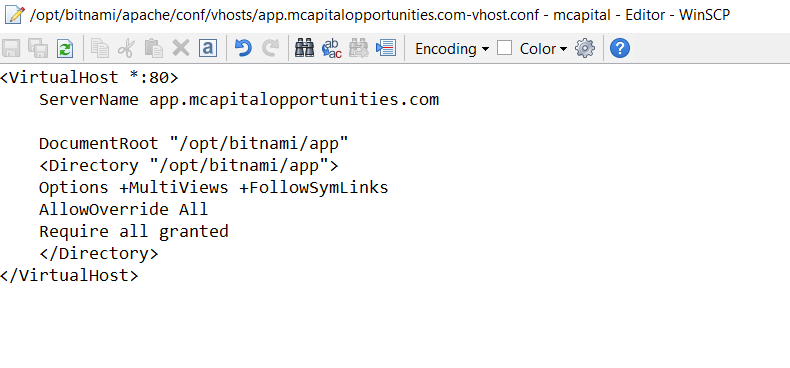
Sub directory root is "/opt/bitnami/app". Please upload app directory here. Please verify your have SSL cerificate file uploaded on right path.

SSLCertificateFile "/opt/bitnami/apache/conf/mcapitalopportunities.com.crt" SSLCertificateKeyFile "/opt/bitnami/apache/conf/mcapitalopportunities.com.key"

After DNS propagation completes (usually 24-48 hours), access your subdomain in a web browser to verify that your Laravel application is functioning correctly under the subdomain.

Email Settings
AWS SES EMAIL SETTINGS

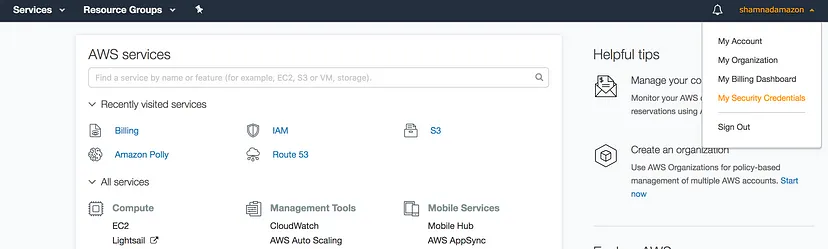
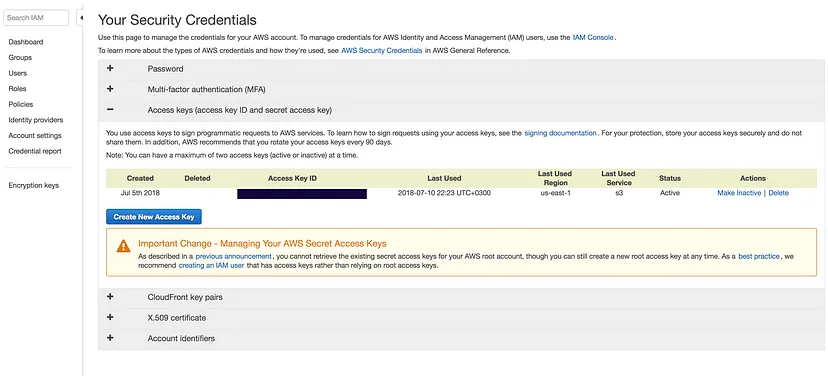
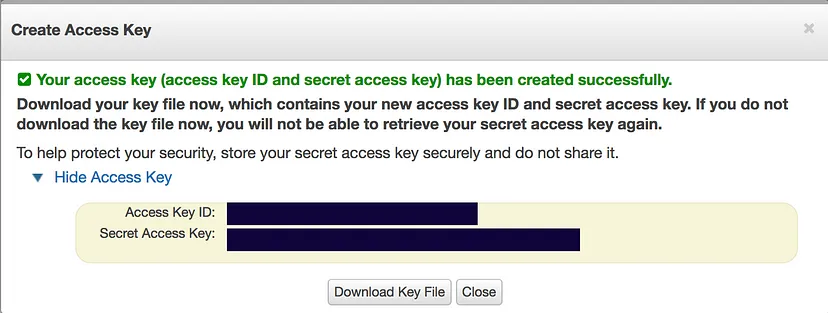
please follow the link https://gist.github.com/damusix/c12400ee0ccb7e56351619ae2b19a303 # Convert AWS IAM credentials to AWS SMTP credentials

If you do, or want to, use AWS to deploy your apps, you will end up using AWS SES via SMTP when you're launching an app that sends out emails of any kind (user registrations, email notifications, etc). For example, I have used this configuration on various Ruby on Rails apps, however, _it is just basic SMTP configurations_ and crosses over to any framework that supports SMTP sendmail.

  • There are two ways to go about this:

  • EASY WAY: Create an SMTP user via AWS SES [http://docs.aws.amazon.com/ses/latest/DeveloperGuide/smtp-credentials.html#smtp-credentials-console]

  • NOT SO EASY WAY: Create an SMTP password for an existing IAM user [^^ Same link scroll down]

    Luckily, you found this MD file and the NOT SO EASY WAY is suddenly copy-pasta... sudo yum....

    Assuming you've already set up your SES Policy on your IAM User:

  • ``` { "Version": "2012-10-17", "Statement": [ { "Effect":"Allow", "Action":["ses:SendEmail", "ses:SendRawEmail"], "Resource":"*" } ] } ```

  • Go ahead and drop this into an bash session, or somewhere in your app, and pass in your IAM user's secret key to generate your SMTP password :)

  • Seconday Color: Secondary color of your system

  • < ? php function aws_iam_smtp_password_generator($secret) { $message = "SendRawEmail"; $versionInBytes = chr(2); $signatureInBytes = hash_hmac('sha256', $message, $secret, true); $signatureAndVer = $versionInBytes.$signatureInBytes; $smtpPassword = base64_encode($signatureAndVer); return $smtpPassword; } ? >

S3 Bucket
AWS Access Key ID and Secret S3 Bucket

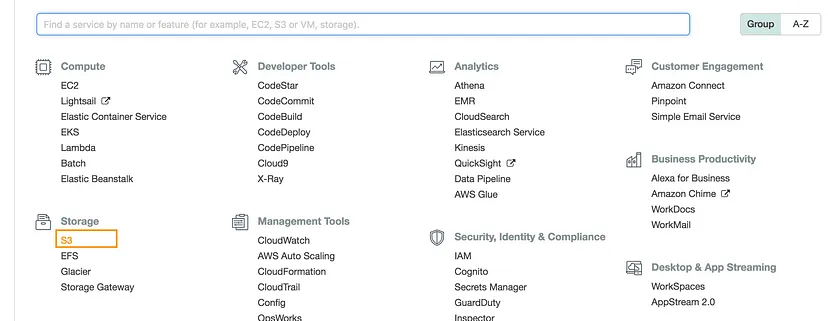
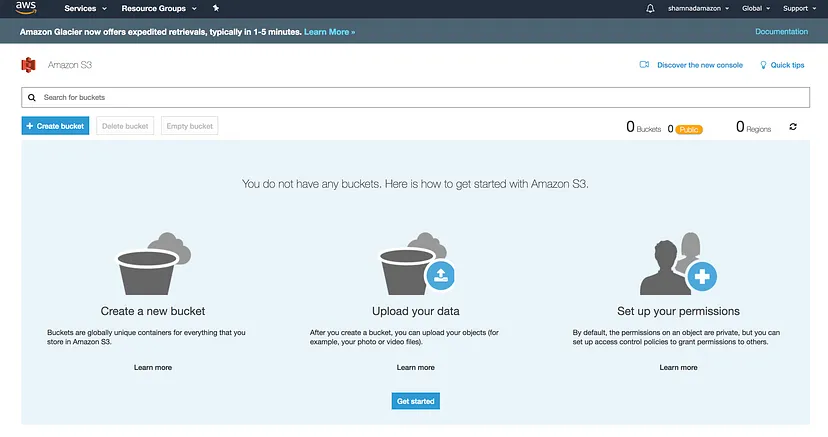
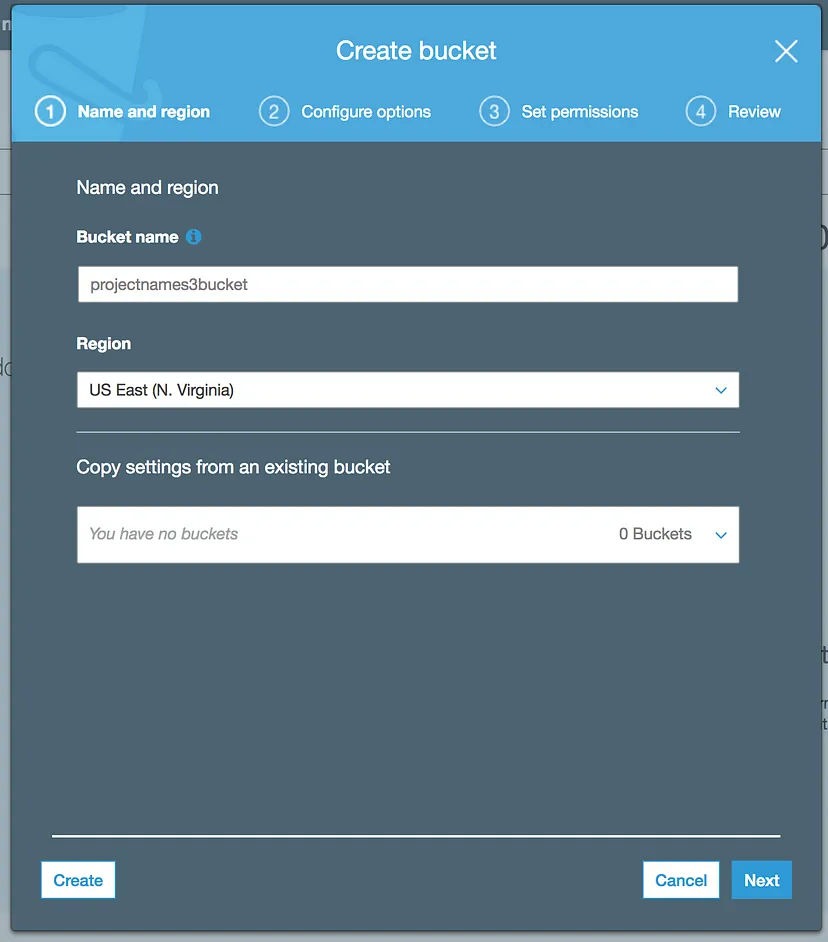
Creating an S3 Bucket

  • Create S3 bucket
  • You can select S3 from the Storage section.
  • Select S3 bucket storage section
  • Create S3 bucket form
  • Generating AWS Access Key ID and Secret Access Key
  • Now you can easily access this account using your Access key and Secret Access key of your AWS account. If you don't have one already then go to your account and click on My Security Credentials
  • Create S3 access key
  • And then select Access keys (access key ID and secret access key) section
  • Select access S3 access key
  • Click on Create New Access Key
  • Generate new access key
  • Download the Key pairs to your system for future use.
  • Click on Show Access key and you will get your Access Key ID and Secret Access Key
  • Access Key ID and Secret Access
Deployment
Update the app Pull Request (https://app.mcapitalopportunities.com)

Connect bitbucket (Only First Time)

  • Open the terminal Select the director cd /opt/bitnami/app

  • git init

  • git remote add aananth123 https://aananth123@bitbucket.org/aananth123/app.git

  • You need enter bibucket username and password

  • git pull origin main

    • Update Laravel Application:
      • composer install

      • php artisan migrate

      • php artisan key:generate

      • php artisan optimize:clear

Existing Repo Deployment

  • Open the terminal Select the director cd /opt/bitnami/app

  • git pull origin main

  • You need enter bibucket username and password

    • Update Laravel Application:
      • composer update

      • php artisan migrate

      • php artisan key:generate

      • php artisan optimize:clear

composer install: This will create vendor directory and install all the packages.Please run this command when vendor directory is missing /opt/bitnmai/app

composer update: This will update all the packages and merge the vendor directory .Please run this command when vendor directory is existing /opt/bitnmai/app

php artisan migration: Executes all pending migrations.

php artisan migrate:rollback: Rolls back the latest migration.

php artisan db:seeder: Creates a new seeder class. (Execute only new installtion)

php artisan optimize:clear

Caches configuration files for performance optimization.

Clears the configuration cache

Clears the view cache.

Clears the application cache.

Clears the compiled classes.

Clears the view file cache.

php artisan key:generate command in Laravel is used to generate a new application key .env file

Run the Scheduler

To activate the cron job, ensure that Laravel’s scheduler is running. You can set it up on your server by adding this to your cron:

Log into your Lightsail server's console

sudo crontab -e

Paste the following at the bottom of the file:

* * * * * php /opt/bitnami/app/artisan schedule:run >> /dev/null 2>&1

To verify the scheduler php artisan schedule:list you can see next scheduler run time

To watch the scheduler php artisan schedule:work you can see scheduler logs

Run the immediate running php artisan schedule:run Execute the scheduler

Troubleshooting
Common Issues & Solutions

Bitnami / Lightsail - Site suddenly started loading Apache2 Debian Default Page.After the reboot plase check its running apache2 or apache. We need enable the apache.

If apache2 is enable please execute the follow the commands terminal

  • sudo service apache2 stop

  • sudo systemctl disable apache2

  • sudo apt remove apache2

  • sudo apt purge apache2

  • sudo /opt/bitnami/ctlscript.sh start apache

  • sudo /opt/bitnami/ctlscript.sh restart apache

  • Reference Link : https://docs.bitnami.com/aws/faq/administration/control-services/

This guide is designed to help you troubleshoot common issues that may arise when you reboot the server.It covers a range of topics, from basic file permissions to complex configuration issues.

File and Directory Permissions

  • Incorrect Permissions

  • Problem: Laravel often requires specific permissions for its directories and files to function correctly

  • chmod -R 775 storage

  • Bootstrap/Cache Directory:

  • chmod -R 775 bootstrap/cache

  • Vendor Directory:

  • chmod -R 755 vendor

Incorrect Ownership:

  • Change Ownership to the Web Server User:

  • chown -R bitnami:bitnami storage bootstrap/cache vendor

htaccess Issues:

  • Problem: A misconfigured .htaccess file can prevent Laravel from routing requests correctly.

  • Double-Check Configuration: Ensure that the .htaccess file is correctly configured to point to the public directory.

  • Temporary Disable: Temporarily rename the .htaccess file to see if it resolves the issue

Laravel Migrations:

  • Problem: Migration errors can occur due to permission issues or database configuration problems

  • Check Database Credentials: Verify that the database credentials in your .env file are correct.

  • Run Migrations: Use the following command to run pending migrations

  • php artisan migrate

Storage Permissions:

  • Problem: Laravel's storage system may encounter issues if it cannot write to the storage directory.

  • Check Permissions: Ensure the storage directory and its subdirectories have the correct permissions.

  • Run Storage Link: Create a symbolic link to the storage directory:

  • php artisan storage:link

PHP Version:

  • Problem: Laravel requires a specific PHP version. (Required above 8.1)

  • Solution: Check PHP Version: Verify that your server is running the required PHP version. Update PHP: If necessary, update your server's PHP version.

Web Server Configuration:

  • Problem: Incorrect web server configuration can lead to various issues.

  • Solution: Check Configuration Files: Review your web server's configuration files (e.g., httpd.conf, nginx.conf) to ensure correct settings. Consult Documentation: Refer to your web server's documentation for specific configuration instructions.